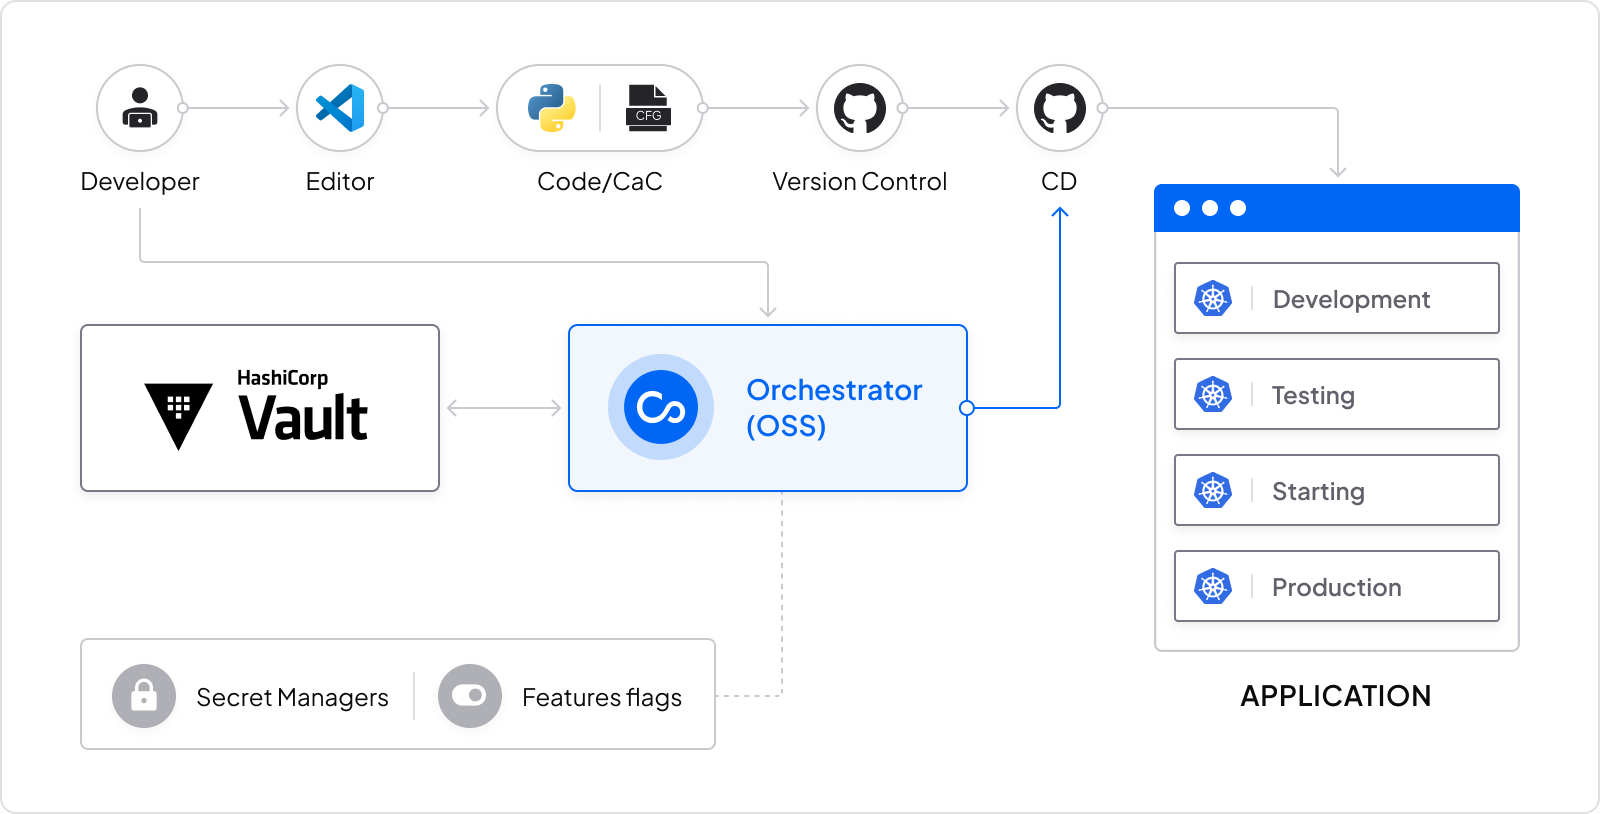
Today’s developer teams are tasked with having to manage Config Ops on the platform as well, and HashiCorp Vault is a great opportunity to show how Configu lets you only worry about your config schemas, with Configu providing the rest of what’s needed, including talking to Vault’s API to get and validate your new config values in place. Check out the tutorial below

image

To complete the tutorial, you’ll need a HashiCorp Vault Server and Credentials (easiest is having it installed as a docker), Git, Configu’s CLI, and a simple ‘hello world’ app to deploy which we’ve provided in this repo.

In most cases, your application already has a configuration file, in this example, we will examine Python code that consumes a PostgreSQL connection URL and a .env file:

os.environ['DB_URL'] = 'psql://{user}:{password}@{host}:{port}/{name}'.format(
  user=os.environ['DB_USER'],
  password=os.environ['DB_PASSWORD'],
  host=os.environ['DB_HOST'],
  port=os.environ['DB_PORT'],
  name=os.environ['DB_NAME']
)
.env.development
DB_USER=user
DB_PASSWORD=123
DB_HOST=127.0.0.1
DB_PORT=5433
DB_NAME=database

Step 1 - Create schema declaration

Instead of maintaining a .env file for each environment or Vault for production and possibly for other sensitive environments, create a .cfgu schema declaration for this service, so that each change will only have to be changed once (only the key in the schema) and then the values will be initialized by the same interface. Our schema will look like this:

my-app.cfgu.json
{
  "keys": {
    "DB_USER": {
      "test": "expect($.value).to.be.a('string')",
      "default": "user"
    },
    "DB_PASSWORD": {
      "test": "expect($.value).to.be.a('string')",
      "default": "123"
    },
    "DB_HOST": {
      "test": "validator.isIP($.value, 4)",
      "required": "true",
      "default": "127.0.0.1"
    },
    "DB_PORT": {
      "test": "validator.isPort($.storedValue)",
      "required": "true",
      "default": "5433"
    },
    "DB_NAME": {
      "test": "expect($.value).to.be.a('string')",
      "default": "database"
    },
    "DB_URL": {
      "test": "expect($.value).to.be.a('string')",
      "const": "psql://{{DB_USER}}:{{DB_PASSWORD}}@{{DB_HOST}}:{{DB_PORT}}/{{DB_NAME}}",
      "description": "Generates a full PostgreSQL URL connection"
    }
  }
}

Although saving configurations in the source control is considered to be bad practice, the Cfgu format is designed to be part of the code as it doesn’t include any sensitive values. Doing that increases developers’ velocity and helps them avoid leaving the terminal/IDE for other config management platforms.

Step 2 - Use defaults for local development

Running a local environment was never easier, choose your preferred way to inject your environment variables:

  • Run Configu seamlessly with your app
configu eval --schema "./my-app.cfgu.json" --defaults | configu export --run "py my-app.py"
  • Inject the variables into your shell
configu eval --schema "./my-app.cfgu.json" --defaults | configu export --source
  • Download and use .env file or any other format you want
configu eval --schema "./my-app.cfgu.json" --defaults | configu export --format "Dotenv" > .env.development

Step 3 - Manage configs in HashiCorp Vault using Configu Orchestrator

Using a single set of commands we can control any store from local files on git to secret managers. In the following example, we will manage our configs over our HashiCorp Vault secret manage.

Authenticate HashiCorp Vault

Configu’s CLI uses the standard env vars HashiCorp uses, if you have the Vault CLI configured and working, there’s no special action to take. If not please configure your environment with the required variables (See variables here).

Upsert values

configu upsert --store "hashicorp-vault" --schema "./my-app.cfgu.json" --set "prod" \
    --kv "DB_USER=user" --kv "DB_PASSWORD=123" --kv "DB_HOST=localhots" \
    --kv "DB_PORT=5433" --kv "DB_NAME=database"

Export values

Similar to the way we previously used the Cfgu defaults we can evaluate and export from any store we need.

configu eval --store "hashicorp-vault" --schema "./my-app.cfgu.json" --set "prod" \
    | configu export --run "py my-app.py"

You’re done! This was a simple operation, but that’s the best way to show someone the power and the simplicity of Configu Orchestrator and how you can use it to manage your configuration automatically and safely using all your current stores.